PDF-XChange Editor Tutorial
How to create your own Stamp
With the PDF XChange Editor, you can import your own stamps into the editor. This can be, for example, another notice stamp, a company stamp or your signature.
And this is how it works
- Create the desired stamp using an image software, MS Word or MS PowerPoint
- From your image software, MS Word, MS PowerPoint, etc., you can now convert the created text to a PDF file with the print command
- You now have one or more PDF files with the file extension .pdf.
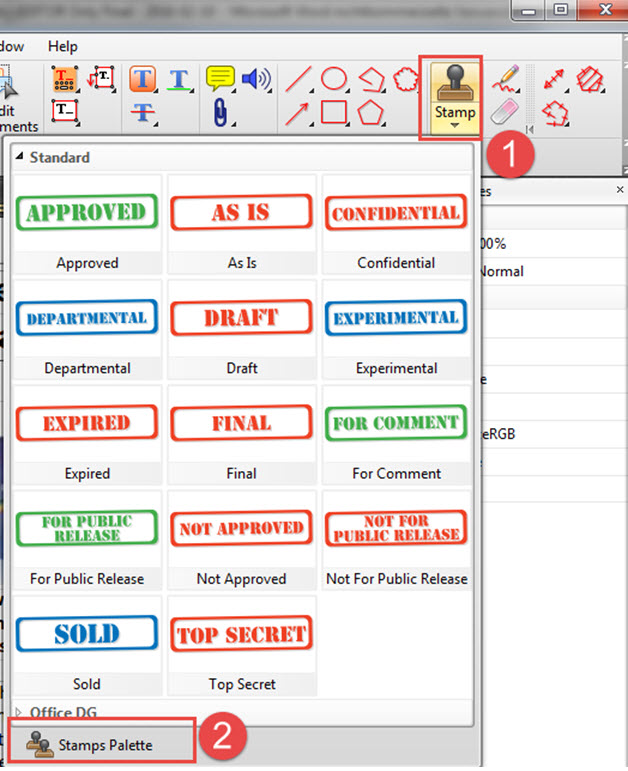
- We have already created a set of common stamp templates, as you can see in the graphic, and you can download these PDF files here

- So first, download the above-mentioned stamp templates or create your own stamp templates now. Click here…
- Then open the PDF XChange editor and choose the “Stamp Tool” (1) and click “Stamp Palette” (2)

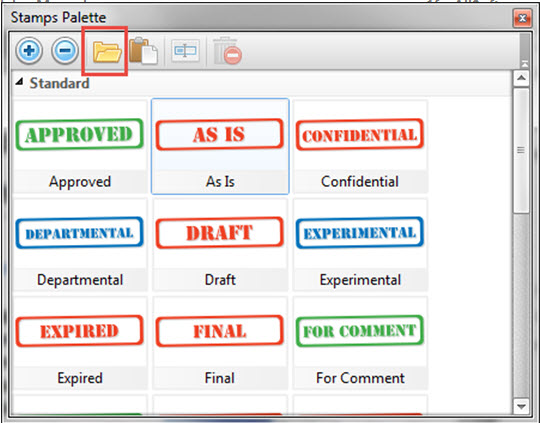
- Now click on “Add new stamp file …”

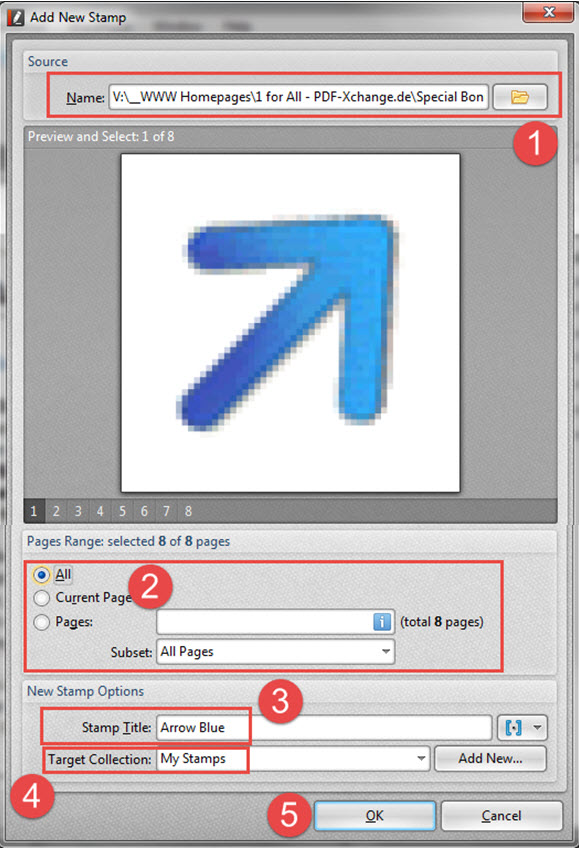
- Click the folder icon (1) to the right of the “Name” field and open the previously created PDF with your stamp.
- Choose if you like to import all pages or just a single page (2)
- Give the stamp a meaningful name under Title (3)
- Then click on “New” (4) to create a new stamp palette, for example “My Stamps”, and confirm by clicking OK (5)
- Now click on “Add new stamp file …”

- Click the folder icon (1) to the right of the “Name” field and open the previously created PDF with your stamp.
- Choose if you like to import all pages or just a single page (2)
- Give the stamp a meaningful name under Title (3)
- Then click on “New” (4) to create a new stamp palette, for example “My Stamps”, and confirm by clicking OK (5)

- Now you should be able to find a new stamp palette called “My Stamp” with your created stamp in it.


